
Where Do You Even Start? The First Steps of Restoring an Old House
- Reorigination
- Mar 26
- 8 min read
(What We Really Did)
This post may contain affiliate links, which means I may earn a small commission if you choose to make a purchase through them, at no additional cost to you. I only share products we have used, love, or would genuinely recommend as you begin your own reorigination.

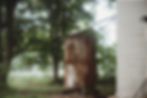
When we bought Maggie, our 1898 Victorian farmhouse (you can read more about the full 5-year journey here), we had more questions than answers, and I think that is a pretty common place to be when you are stepping into something like this.
So the question became:
Where do we actually begin?
Not the romantic answer.
The REAL one. (because if I am being honest, I would have loved to just hang up a porch swing, grab a book and a cat, and call it a day.)
Sadly, our story is not one of those polished, made-for-TV versions where everything works out perfectly. We closed on Maggie just after a tornado had come through our town, taking out trees across the property, and as COVID was just beginning.
So the timing probably could not have been any worse to start on this new journey of our own.
But we did.
And we were excited!
But we were also overwhelmed.
And it was around that time a friend and mentor told us something that stuck.
It is going to sound simple. Maybe even a little dumb.
But it is actually pretty profound.
You start by starting.
And that is exactly what we did.
Step 1: Bring in the Right Perspectives and Ask the Right Questions
Before we picked up a single tool, we started by bringing in as many informed perspectives as we could.
We connected with:
a general home inspector, who gave us a glorious 80-page report of everything we could possibly start fixing
a structural engineer to help us understand the integrity of the home and what needed to be addressed based on current standards
old house mentors, who gave us the honest reality of how long this would likely take and what we needed to anticipate
a surveyor to establish property boundaries
an arborist to assess the land and trees
local county offices and records to understand if there were any historic designations, preservation requirements, or additional regulations that would impact what we could do
general contractors to get quotes, understand what they would take the lead on, and hear their ideas (which was quickly ruled out based on a lack of shared vision and… budget, LOL)
and, of course, plenty of friends and family to help fuel our excitement and imagination
Each one helped us see something differently and piece together what we were actually working with, from structure, to land, to how the house functioned to what we could realistically take on. We started writing everything down and gathering a few basic tools to help us understand what we were looking at (we shared the ones we used here).
This also opened our minds to other questions we needed answered a layer deeper, such as:
What utilities were in place and how they were functioning, including water, sewer, and electrical
Where those systems entered the house and how they were connected
What would need to be relocated or updated
What was original, and what had been added over time (We also leaned on a few old house reference books that helped us understand what we were looking at here)
What the biggest priorities were, and how much it was realistically going to cost
These were not the exciting questions, but they were the ones that shaped everything that followed.
Step 2: Reclaim and Secure the Property
A lot of things started happening at the same time, based on timing and the availability of people.
While we were getting feedback on the overall stability of the house and beginning to think through engineering plans to shore up certain areas, we also wanted to start with something we could immediately impact.
And for us, that was cleaning up and securing the property.

Maggie had been sitting for a while.
Overgrown and hidden.
And a playground for snakes, squirrels, raccoons, and more!
It was not going to be worth doing all of this work if anyone (or anything) could just walk in, come and go, and take advantage of a place that clearly looked like no one was there.
We replaced and installed a new back door (which was quite the upgrade from the open, barbed wire gaping hole).
We repaired the front fence and added a fresh coat of stain.
We restored two gate closures to control access to the property. (We shared the basic security and property tools we used here.)

Once the property was secure, we also focused on:
cutting back trees
clearing limbs
opening up the yard
They were not large projects, but they helped reestablish a sense of care, presence, and ownership, and they were probably the first visual signs to the community about the beginning of a new chapter for the property.

A Quick Reality Check
This is also, ironically, where we learned one of our first unexpected lessons.
We went from having about a tenth of an acre in a neighborhood… to over six acres, and quickly realized we were not equipped for that.

We did not have the right tools or equipment, and there are some really funny memories of John Michael out there with a push mower sweatin' it out doing his best to make a dent in six acres.
It was ambitious. Completely unrealistic, and it was a learning curve that had nothing to do with the house itself, but everything to do with caring for a property this size. (*Adds bigger mower to the list of things to buy*)
But we also knew it had to be done.
Clearing trees and maintaining the yard was not just about how it looked. It helped keep bugs, critters, and wildlife away, which we would come to learn over the years just how much there was, both inside and outside of the house.
The First Hard Decision
During this phase, we faced our first major call.
The large maple tree out front was rotting.
When we walked the property with the arborist, we spent time looking at all of these mature trees, some of which could have been there for generations (we share more about Maggie’s history here). That was one of the things I loved most about this property.

So hearing that the tree closest to the house was not in good condition was not easy.
It was actually the first time I cried in this process.
It was beautiful, and it felt like part of the story, but we also knew what was at stake.
Keeping it meant risking it falling onto the house we were just beginning to invest in, and I remember JM telling me I would cry a whole lot more if we lost both the tree and the house.
So we made the decision to take it down, and besides the sticker shock to do so, it was also one of the first moments that really clarified something for us:

Not everything can be saved, even when you want it to be.
And sometimes doing the right thing still feels like a loss.
Step 3: Prioritize Structure and Protection
After walking the house with multiple perspectives and starting work outside, a clear pattern began to emerge.
We needed to prioritize structure and protection first.
More specifically, we needed to start with water.
What we learned early on is that most major issues in old homes do not come from age alone, but from water going where it should not.

So before moving forward with anything cosmetic, we focused on:
roof condition
gutters and downspouts
how water was moving, or not moving, away from the house
areas where water could enter through walls, framing, or foundation
This was our first introduction to thinking about the house as a system.
How it separates inside from outside.
How air, water, and temperature interact.
And how every decision we made would impact something else.
Step 4: Establish the Right Order
So we needed a plan.
Not a perfect one, but at least a clear direction.
Because one thing became very obvious early on:
The order you do things in an old house matters.
Doing things out of sequence can create new problems, undo previous work, or cost you more in the long run.
So we built a tentative priority list based to try to avoid that as much as possible.

We worked from the outside in and from top down:
gutters and eaves
roof and chimney
framing, including ceilings, floors, foundation, and porch
and then the full house envelope
At the same time, we began sketching early plans based on what we were uncovering.
This phase was less about visible progress and more about making sure we were setting ourselves up to move forward the right way.
Step 5: Move Into Demolition with Intention
With a general plan in place and a clearer understanding of what needed to be prioritized, it was time to take the next step.
Demolition.
But not in the way most people think!
By this point, we were not just tearing things out. We were making decisions.
What stays.
What goes. (We break down how we identified Maggie’s style and details here.)
And very quickly, we realized something else.
If we were going to take this house apart, we needed to document everything.
And I mean EVERYTHING.
We photographed details.
We labeled parts.
We grouped like pieces together.
We wrote down measurements.
We took photos from every angle.
We took video.

Because once something is taken apart, you are responsible for knowing how to put it back.
And while you may think you will be back to it next month...the reality is it might be a year... or 2...or 3...
Trust me, by then you will NOT remember exactly where that piece of trim went, which door it belonged to, or how something was originally layered together.
So if there is one piece of advice from this phase, it is this:
You cannot over document an old house.
Document it for a future version of yourself that will be digging through storage piles years later from now trying to remember where that one transom window came from and why you were so confident you would “definitely remember.” Because you definitely won't.
What We Removed
later additions and spaces that did not belong to the original structure, such as the bathroom added to the back of the house
sheetrock and other added materials
kitchen cabinets that were not part of the original design
old carpet
broken furniture and appliances
tons of debris and discarded items found in the attic and underneath the house
old vinyl siding that had been added over the original clapboard
rotting wood and anything beyond repair
What We Preserved

all original doors, trim work, windows, transom windows, and their hardware
porch details and gingerbread trim
the staircase
tongue and groove walls and ceilings
heart pine floors
original clapboard on the exterior that could be saved
fireplace tile, mantels, and any original brickwork
Not everything can be saved, but the right things should be.
As we continued, any other historic or important elements that we uncovered, we approached with that same mindset. (Excited to elaborate on this more in another upcoming article.)
Step 6: Plan Demolition Logistically
Demolition is not just physical work. It is logistical.
A few things we learned quickly:
dumpsters are expensive, so timing matters
demo moves quickly, and so does the volume of debris
saved materials require space, organization, and a system
You need a plan for both what is leaving and what is staying, because everything piles up faster than you expect.
From Here
From here, the focus shifts from uncovering to… more uncovering, LOL… to eventually rebuilding, and from questions to more questions to maybe some decisions.
And while we do not have everything figured out (spoiler alert, we still do not), we had enough to move forward with intention.

That is what this phase was really about, learning and understanding what we truly had, making thoughtful decisions, and setting the foundation for everything that would come next.
We started by starting, and you can too!
If you have questions about how to get started, the partners we worked with, or what this process looked like for us, feel free to reach out and connect.
Thanks for being here for our reorigination. We would love to help you with yours too!